|
CopyMove 2013 version 3.8.0 and later can be used with the new declarative SharePoint 2013 workflow model. Earlier versions of CopyMove 2013 will fail with an error. Basically, a SharePoint 2013 workflow must use the Call HTTP Web Service (Http Send) workflow action to send a Copy or Move Web request to the CopyMove REST Web Service. Specifically, use the endpoint ~site/_vti_vin/CopyMoveJSON.svc/Copy or ~site/_vti_vin/CopyMoveJSON.svc/Move to invoke a Copy or a Move transaction respectively. A transaction has succeed when the resulting HTTP status code is 200 (OK) and the CopyMove error code in the resulting JSON response equals zero. Transactions can of course also fail and can do so in two ways; first it can fail with an HTTP error code other than 200 (OK) and secondly it can also fail with a CopyMove error code in the resulting JSON response. Consequently, workflows should always check both to determine if the transaction completed without errors. The CopyMove error code can be retrieved from the ErrorCode property in the resulting JSON object. It will assume one of the following three integer values:
| • | 1 = Transaction aborted with warning(s) |
| • | 2 = Transaction aborted with error(s) |
See the API documentation for more details on the CopyMoveResult class which the JSON result represents. To illustrate the process of creating a workflow, let us now try and create a simple SharePoint 2013 type workflow that copies the current document to another document library in the same SharePoint web site.
| 1. | With SharePoint Designer 2013, open the SharePoint site to create a new workflow in. |
| 2. | Select the Workflows node in the left hand navigation pane. |
| 3. | Select a document library or list from the List Workflow button in the ribbon. This opens the Create List Workflow dialog as shown in the following screen shot:
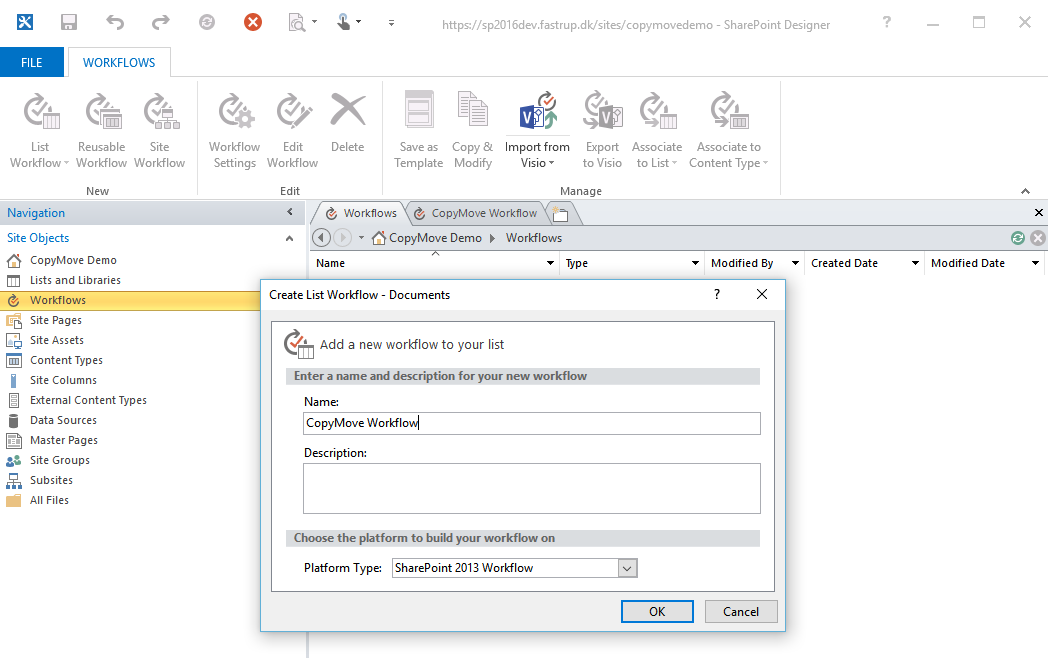 |
| 4. | Specify a name for the workflow, e.g. CopyMove Workflow and choose SharePoint 2013 Workflow as the Platform Type. Then click the OK button to create a blank workflow. |
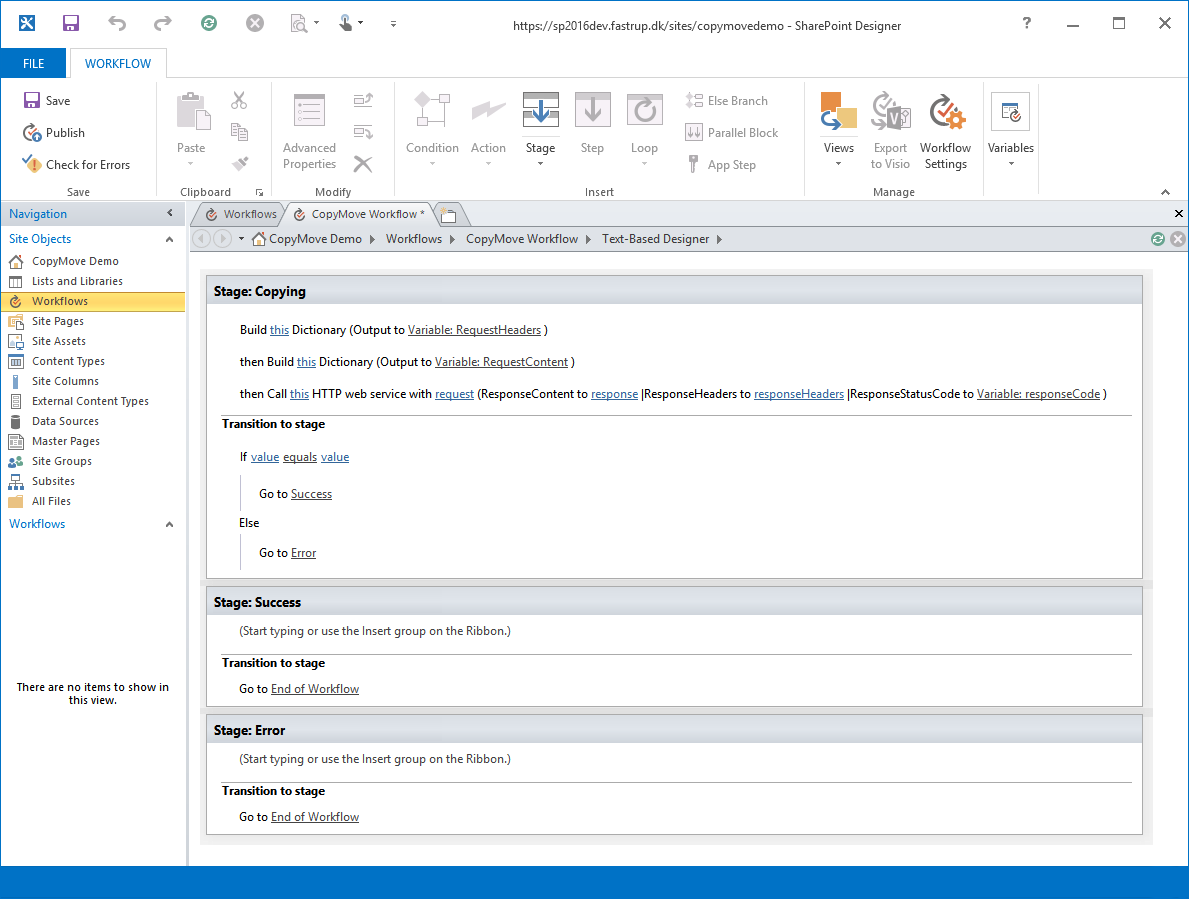
| 5. | Rename Stage 1 to Copying and add two more stages named Success and Error. |
| 6. | In the Copying stage, add two Build Dictionary actions and let them output to two new dictionary variables named RequestHeaders and RequestContent respectively. |
| 7. | After these, add an instance of the action named Call HTTP Web Service. |
| 8. | Finally, connect the three stages through an IF condition in the Copying stage and Go to Stage action in the Success and Error stages. The IF condition should transition to Success when it evaluates to true and to Error when false. The Success and Error stages should both transition to the End of Workflow. |
| 9. | The workflow, should with the completed steps above, now look like this:
 |
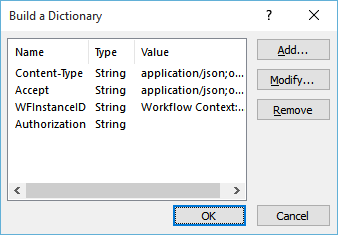
| 10. | Next steps is to configure all actions. First, configure the dictionary action that builds the RequestHeaders dictionary and add the following entries:
|
Name
|
Value
|
Description
|
Accept
|
application/json;odata=verbose
|
|
Content-Type
|
application/json;odata=verbose
|
|
WFInstanceID
|
Workflow Context:Instance ID
|
CopyMove needs the workflow instance id to impersonate the user who initiated the workflow.
|
Authorization
|
|
Empty value, which is critical for the workflow to authenticate with SharePoint.
|
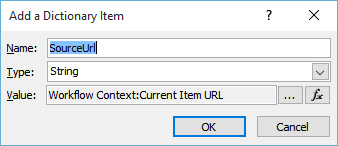
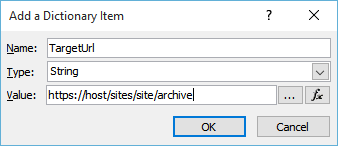
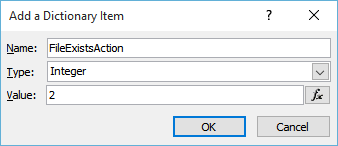
| 11. | Then configure the RequestContent dictionary with four entries named SourceUrl, TargetUrl, FileExistsAction and HaltOnWarning as shown in these four screen shots from SharePoint Designer 2013:
  |
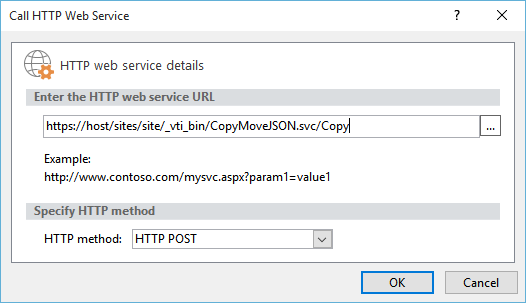
| 12. | Configure the Call HTTP Web Service action to call the Copy endpoint at <your site>/_vti_bin/CopyMoveJSON.svc/Copy as illustrated by this dialog:
 |
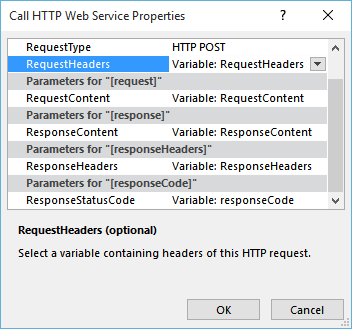
| 13. | Right click the Call HTTP Web Service action and select Properties to open the Properties dialog. Then link the parameters RequestHeaders, RequestContent, ResponseContent and ResponseHeaders to dictionary variables as shown here:
 |
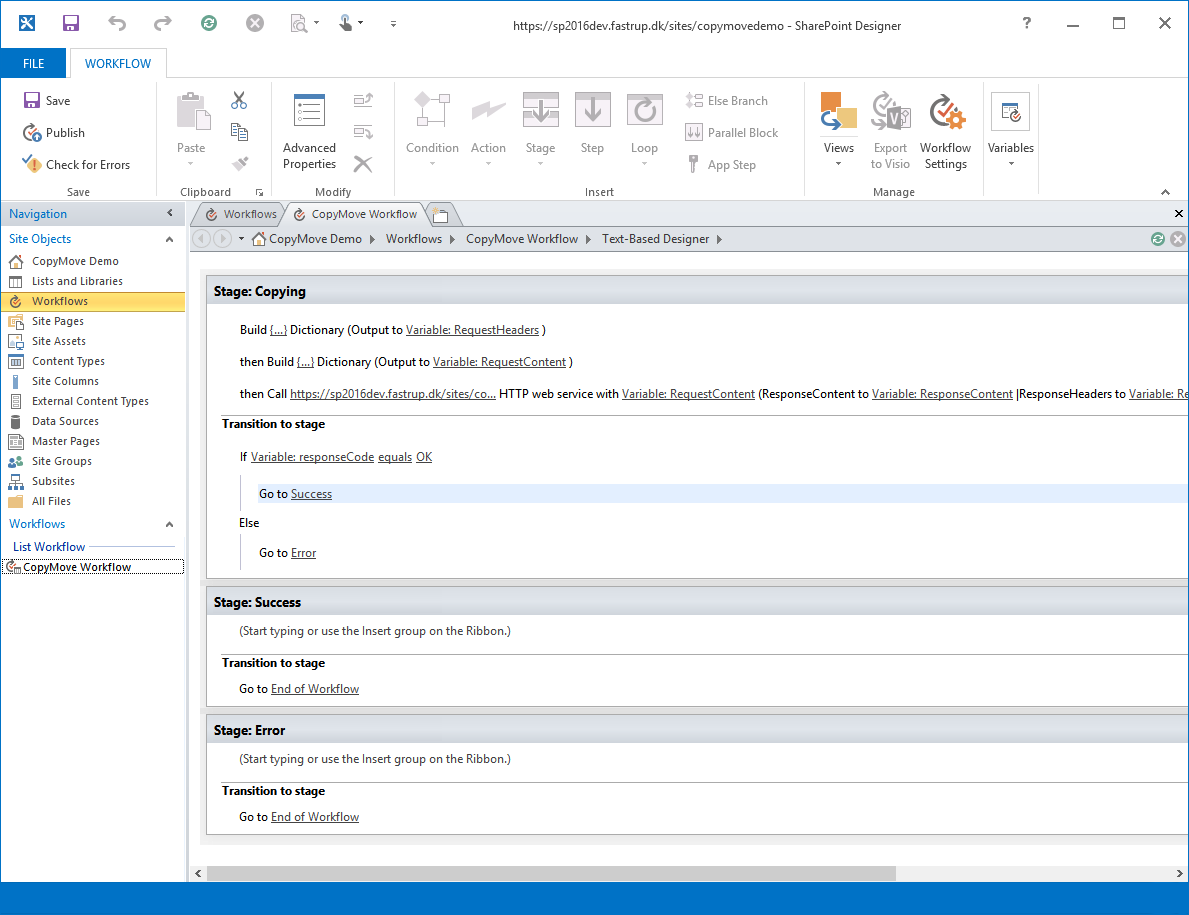
| 14. | Finally, configure the IF condition in the Transition to Stage section to evaluate of the variable named responseCode equals the string OK. The workflow is now complete and should look as illustrated by the following screen shot.
 |
| 15. | Verify that the workflow does not contain any errors by clicking the Check for Errors button in the ribbon. Then click the Publish button to deploy it to SharePoint. |
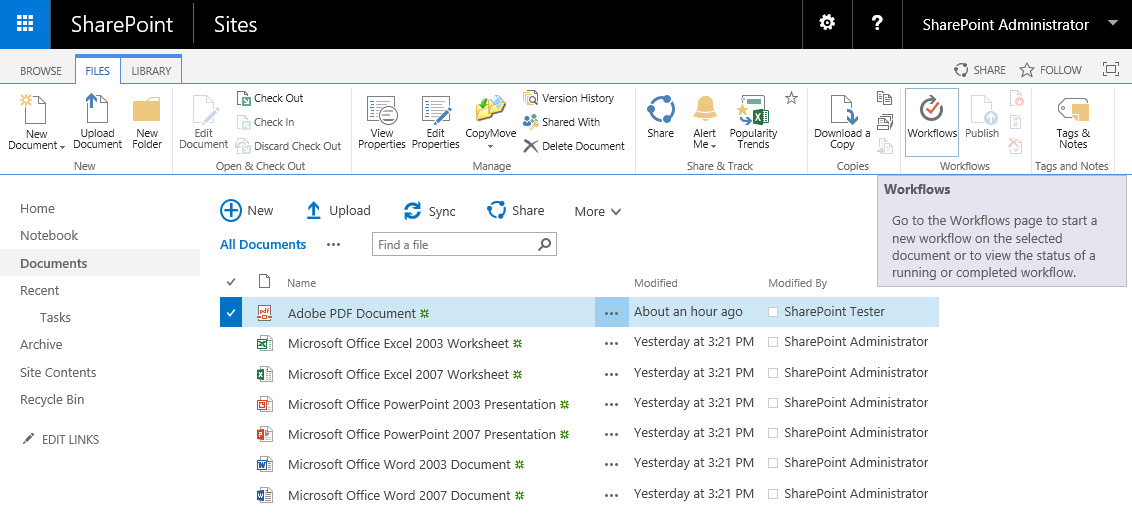
| 16. | Next, let's test the workflow in SharePoint by opening the SharePoint site and navigate to the document library or list that the workflow was created for. Then select an item and click the Workflows button in the ribbon as shown below.
 |
| 17. | Start the workflow by clicking the CopyMove Workflow link the section Start a New Workflow.
 |
| 18. | Once, the workflow starts it will update the CopyMove Workflow column with the name of the currently executing stage. First it will say Copying.
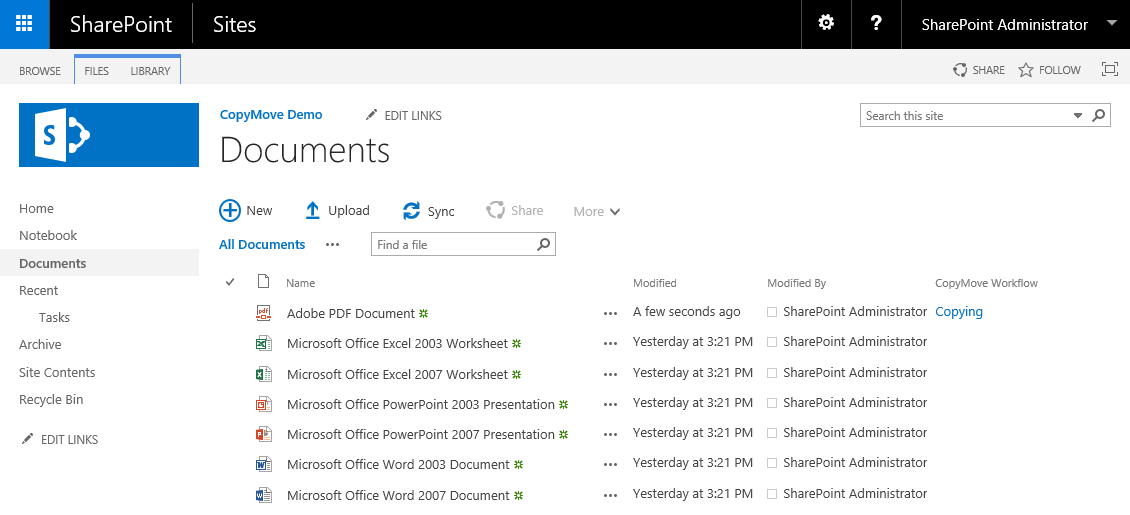 |
| 19. | When completed - it will show Success or Error.
 |
| 20. | This completes the tutorial on building SharePoint 2013 workflows that leverage the CopyMove 2019 REST API. From here you can extend and optimize the workflow to meet your business requirements. |
|