Activating the CopyMove feature as described in the section Activating the CopyMove Features registers the Copy and Move actions with document libraries and lists created from standard SharePoint list templates. See the section Supported List Types for a complete overview of the list types that CopyMove support out of the box.
Document libraries and lists created from custom list templates will not integrate with CopyMove without some customization as outlined in this section. This is by design as SharePoint requires custom UI actions in a list view to be registered independently for each list type. It is simply not possible to register custom actions in one go for all list types. Consequently, you will need to register the CopyMove UI actions for each custom list template that CopyMove must also integrate with. The recommended way to do this is to register the actions via a custom SharePoint feature deployed through a SharePoint 2019 solution package created with Visual Studio 2015. The CopyMove 2019 product download includes a sample Visual Studio project named Custom List Template that registers CopyMove with a custom document library template and a custom list template.
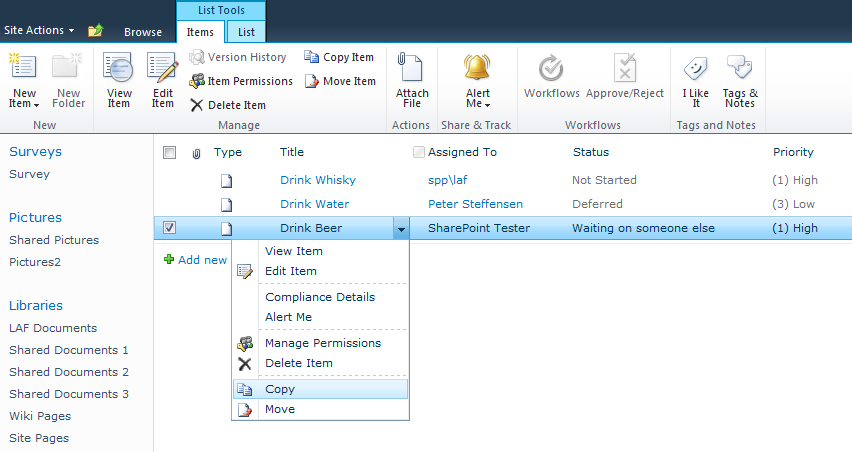
The Custom List Template sample demonstrates how to register CopyMove with a custom document library template and a custom list template as illustrated by the following two screen shots respectively. The sample registers a Copy action and a Move action with the ribbon and with the item drop-down menu.
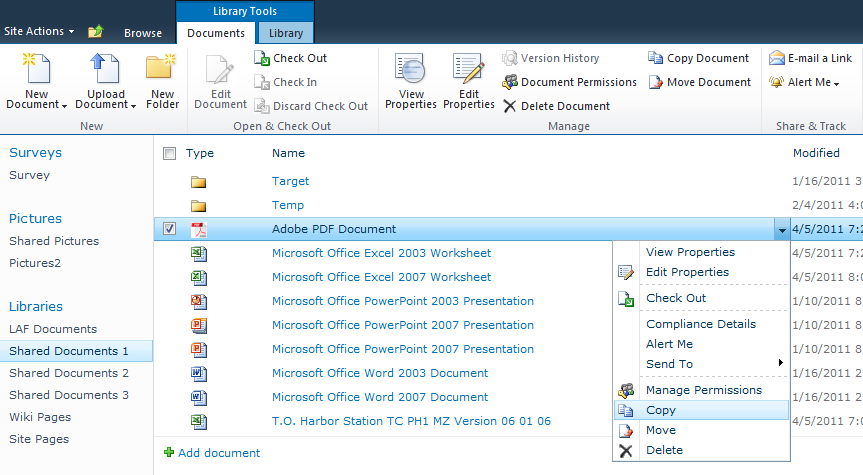
To register the Copy action with a custom document library template, simply reference the XML snippet below in a SharePoint feature as shown by the Custom List Template sample project. The <CustomAction> element registers the Copy action with the ribbon in two locations; the first <CommandUIDefinition> element registers it with the ribbon in the View Item form and the second <CommandUIDefinition> element registers it with the ribbon in document library views.
<CustomAction
Id="CustomDocumentLibrary.Ribbon.Copy"
RegistrationId="101" RegistrationType="List"
Location="CommandUI.Ribbon" Sequence="5"
Rights="ViewListItems" UIVersion="4">
<CommandUIExtension>
<CommandUIDefinitions>
<CommandUIDefinition
Location="Ribbon.ListForm.Display.Manage.Controls._children">
<Button
Id="SCustomDocumentLibrary.DispForm.CopyButton"
Command="CustomDocumentLibrary.CopyDocument"
Image32by32="/_layouts/15/images/spp/Copy32.gif"
Image16by16="/_layouts/15/images/copy16.gif"
LabelText="Copy Item" ToolTipTitle="Copy Item"
ToolTipDescription="Copy the selected items."
Sequence="100" TemplateAlias="o2" />
</CommandUIDefinition>
<CommandUIDefinition
Location="Ribbon.Documents.Manage.Controls._children">
<Button
Id="CustomDocumentLibrary.AllItems.CopyButton"
Command="SharePointProducts.CopyMove.CustomDocumentLibrary.CopyDocuments"
Image32by32="/_layouts/15/images/spp/Copy32.gif"
Image16by16="/_layouts/15/images/copy16.gif"
LabelText="Copy Document" ToolTipTitle="Copy Document"
ToolTipDescription="Copy the selected documents."
Sequence="100" TemplateAlias="o2" />
</CommandUIDefinition>
</CommandUIDefinitions>
<CommandUIHandlers>
<CommandUIHandler
Command="CustomDocumentLibrary.CopyDocument"
CommandAction="javascript:SPP_CopyItem('{SiteUrl}','Copy Document')" />
<CommandUIHandler
Command="CustomDocumentLibrary.CopyDocuments"
CommandAction="javascript:SPP_CopyItems('{SiteUrl}','Copy Documents')"
EnabledScript="javascript:SPP_EnableCopyCommand()" />
</CommandUIHandlers>
</CommandUIExtension>
</CustomAction>
Similarly, use the following XML to register the Move action:
<CustomAction
Id="CustomDocumentLibrary.Ribbon.Move"
RegistrationId="101" RegistrationType="List"
Location="CommandUI.Ribbon" Sequence="5"
Rights="ViewListItems" UIVersion="4">
<CommandUIExtension>
<CommandUIDefinitions>
<CommandUIDefinition
Location="Ribbon.ListForm.Display.Manage.Controls._children">
<Button
Id="CustomDocumentLibrary.DispForm.MoveButton"
Command="CustomDocumentLibrary.MoveDocument"
Image32by32="/_layouts/15/images/spp/Move32.gif"
Image16by16="/_layouts/15/images/upload.gif"
LabelText="Move Item" ToolTipTitle="Move Item"
ToolTipDescription="Move the selected items."
Sequence="101" TemplateAlias="o2" />
</CommandUIDefinition>
<CommandUIDefinition
Location="Ribbon.Documents.Manage.Controls._children">
<Button
Id="CustomDocumentLibrary.AllItems.MoveButton"
Command="CustomDocumentLibrary.MoveDocuments"
Image32by32="/_layouts/15/images/spp/Move32.gif"
Image16by16="/_layouts/15/images/upload.gif"
LabelText="Move Document" ToolTipTitle="Move Document"
ToolTipDescription="Move the selected documents."
Sequence="101" TemplateAlias="o2" />
</CommandUIDefinition>
</CommandUIDefinitions>
<CommandUIHandlers>
<CommandUIHandler
Command="CustomDocumentLibrary.MoveDocument"
CommandAction="javascript:SPP_MoveItem('{SiteUrl}','Move Document')"/>
<CommandUIHandler
Command="CustomDocumentLibrary.MoveDocuments"
CommandAction="javascript:SPP_MoveItems('{SiteUrl}','Move Documents')"
EnabledScript="javascript:SPP_EnableMoveCommand()" />
</CommandUIHandlers>
</CommandUIExtension>
</CustomAction>
Adapt the XML as follows for each custom document library template that you need to support:
| 1. | Update the RegistrationId attribute to match the template id of your custom document library template. |
| 2. | Update the Id attributes with unique values across templates. |
| 3. | Update the Command attributes with unique values across templates. |
Finally, be aware that the custom actions outlined above rely on the availability of several Javascript methods including; SPP_CopyItem, SPP_CopyItems, SPP_MoveItem, SPP_MoveItems, SPP_EnableCopyCommand and SPP_EnableMoveCommand. The methods will be available if you have activated the CopyMove site collection feature or the CopyMove Web application feature. But should you decide to only activate CopyMove through a custom feature then the following XML must also be referenced in the feature to include the CopyMove Javascript in Web pages.
<CustomAction ScriptSrc="SPP/Platform.js" Location="ScriptLink" Sequence="100">
</CustomAction>
<CustomAction ScriptSrc="SPP/CopyMove.js" Location="ScriptLink" Sequence="200">
</CustomAction>
A good source for further inspiration is the feature XML files deployed by CopyMove to the following locations on each farm server:
C:\Program Files\Common Files\Microsoft Shared\Web Server Extensions\15\TEMPLATE\FEATURES\SPPCopyMoveSite
C:\Program Files\Common Files\Microsoft Shared\Web Server Extensions\15\TEMPLATE\FEATURES\SPPCopyMoveWebApp
Here you can see exactly how CopyMove registers with all the list types listed in the Supported List Types section.