|
Organizations often have policies and regulations that require them to track what documents users are accessing and when. For this reason, CopyMove also integrates with the built-in auditing facilities in SharePoint 2010. When auditing is enabled for copy and move events then CopyMove will log the following information to the SharePoint audit log for each item that is copied or moved:
| • | The date and time of the event. |
| • | The id of the user who triggered the event. |
| • | The id and the location URL of the item that was copied or moved. |
| • | The type of the event (Copy or Move) |
| • | The id and the location URL of the destination folder where the item was copied or moved to. |
Again, note that this information is logged per item and not per transaction. To enable CopyMove auditing for a site collection, follow these steps:
| 1. | Open the root site of the site collection for which to configure auditing. |
| 2. | Select Site Settings in the Site Actions menu. |
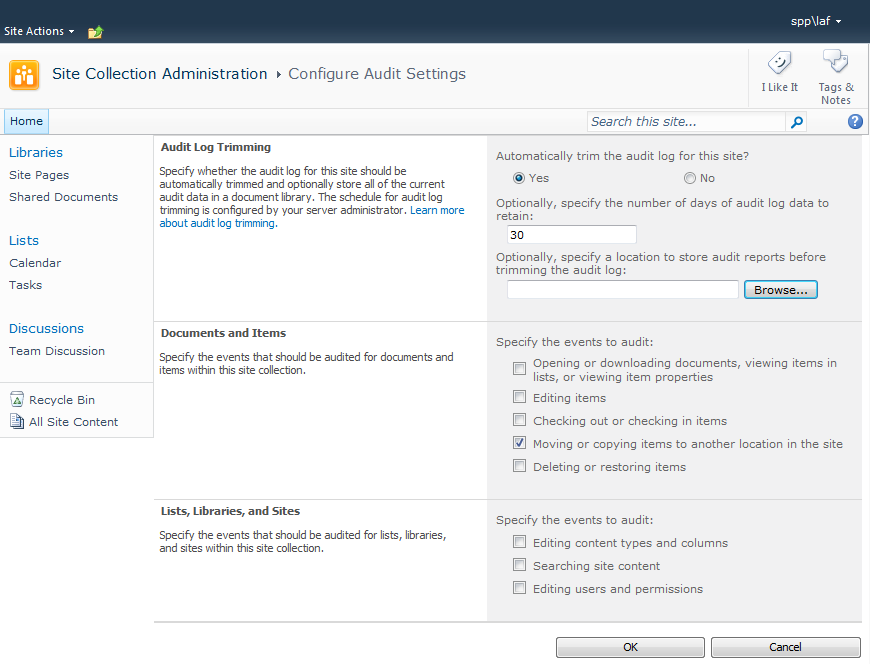
| 3. | On the Site Settings page, click the Site collection audit settings link in the Site Collection Administration group. This brings up the Configure Audit Settings page shown below.

|
| 4. | Check the check box labeled Moving or copying items to another location in the site to include CopyMove events in the audit log. |
| 5. | Click the OK button to save the change. |
Entries in the SharePoint audit log can in turn be viewed and analyzed using the built-in audit log report generator in SharePoint or any other tool capable of mining the SharePoint audit log. To generate a report for Copy and Move events in a site collection, follow the steps below:
| 1. | Open the root site of the site collection for which to configure auditing. |
| 2. | Select Site Settings in the Site Actions menu. |
| 3. | On the Site Settings page, click the Audit log reports link in the Site Collection Administration group. |
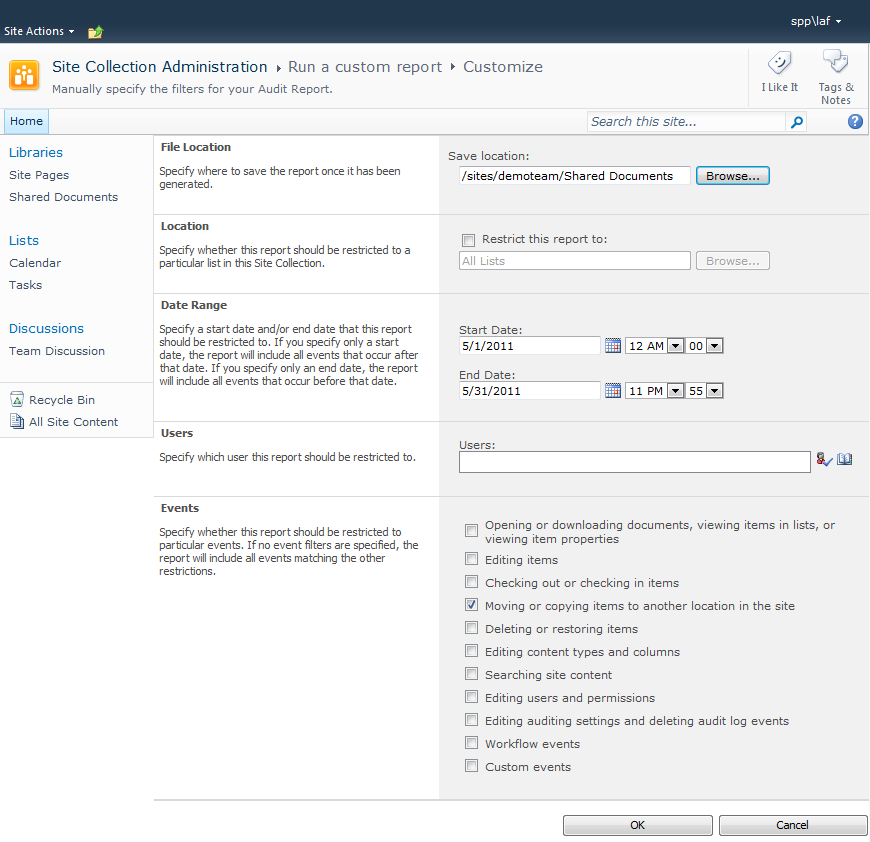
| 4. | On the View Auditing Reports page, select Run a custom report. This brings up the page shown below.
 |
| 5. | Select a document library in the site collection where to save the report to. |
| 6. | Optionally, specify a data range. |
| 7. | Optionally, limit the report to one or more users. |
| 8. | Check the event labeled Moving or copying items to another location in the site. |
| 9. | Click the OK button to generate the report. |
| 10. | Open the resulting Excel document to view the result. |
On a final note, make sure to trim the audit log in order to prevent it from growing into an unmanageable size. You can for instance limit the log to only retain events for the last 30 days as shown in the first screen shot in this section.
|

